To maintain a Dutch oven, always use cooking fat, be conscious of heat levels, avoid using metal utensils, wash by hand, and handle with care. It’s important to take care of your Dutch oven to ensure it lasts a long time and remains in good condition.
Using cooking fat, such as oil or butter, can help provide a non-stick surface and protect the enamel coating. Be careful with heat levels, as enameled Dutch ovens are great at retaining heat and can easily burn food if the flame is too high.
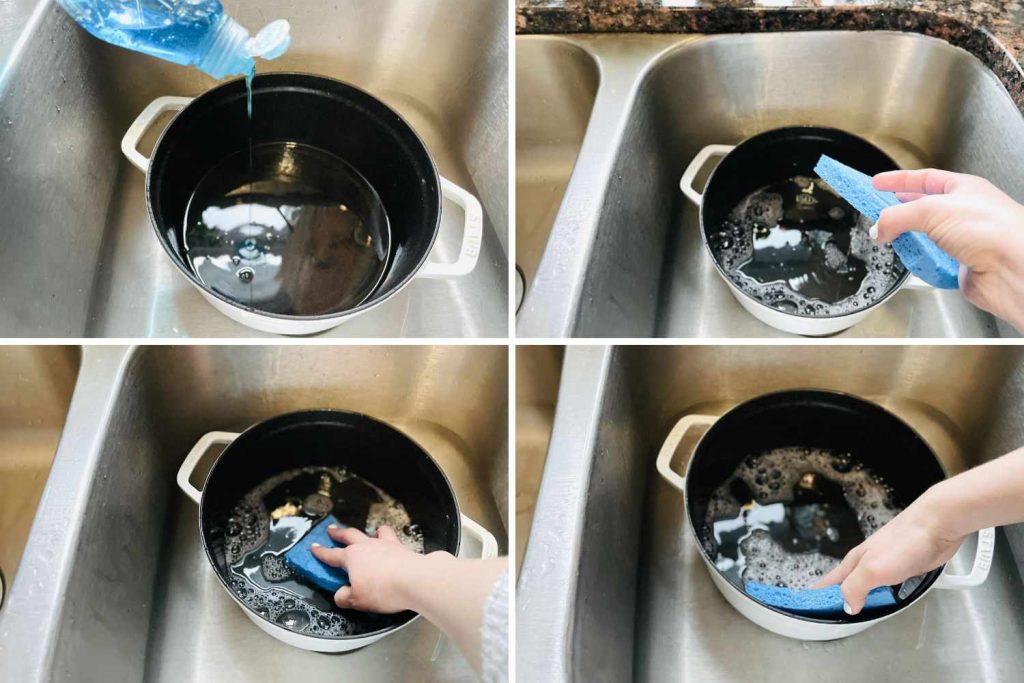
Use wooden or silicone utensils to prevent scratches on the enamel. Hand washing with a soft sponge and gentle detergent is recommended to prevent damage. By following these tips, you can keep your Dutch oven in great shape for years to come.

Credit: www.goodhousekeeping.com
Cooking Tips For Dutch Oven
To maintain your Dutch Oven, always use cooking fat, be conscious of heat levels, avoid using metal utensils, wash by hand, and handle with care. Lightly oiling the Dutch Oven before storing can prevent rust formation. Make sure to spread the oil evenly all over the cast-iron surface.
Cooking Tips for Dutch Oven Maintaining a Dutch oven is important to ensure it lasts a long time and continues to perform well. A well-maintained Dutch oven can help you cook delicious meals while taking care of your cookware. In this section, we’ll discuss some cooking tips for Dutch ovens, including how to choose the right cooking oil, control heat levels, and use non-metal utensils.Choose Right Cooking Oil
When it comes to choosing the right cooking oil for your Dutch oven, it’s important to choose an oil with a high smoke point. This means that the oil can withstand high temperatures without burning or smoking. Some examples of oils with high smoke points include vegetable oil, canola oil, and grapeseed oil. When using these oils, make sure to spread a thin layer evenly over the surface of the Dutch oven to prevent sticking and improve browning.Control The Heat Levels
One of the most important cooking tips for Dutch ovens is to control the heat levels. Enameled Dutch ovens are great at retaining heat, and as such, they require less heat than other cookware. Start with a low heat setting and gradually increase the temperature if necessary. Also, avoid placing a hot Dutch oven directly on a cold surface as this can damage the cookware.Use Non-metal Utensils
Avoid using metal utensils when cooking with a Dutch oven, as they can scratch the enamel coating and reduce the lifespan of your cookware. Instead, opt for wooden or silicone utensils to ensure your Dutch oven stays in good condition. In addition to these cooking tips for Dutch ovens, it’s essential to always wash the cookware by hand and handle it with care. Never wash it while it’s still hot or put it in the dishwasher. Also, light oiling after cleaning can help prevent rusting and keep your Dutch oven in excellent condition. By following these cooking tips for Dutch ovens, you can ensure that your cookware lasts for years to come and retains its excellent performance.
Credit: www.katiescucina.com
Cleaning Techniques For Dutch Oven
To maintain the quality of your Dutch oven, you must take care of it by washing it by hand, avoiding the use of metal utensils, and being conscious of heat levels. You should also always use cooking fat to keep rust from forming and handle it with care to prevent any chips or cracks in the enamel.
Cleaning Techniques for Dutch Oven A Dutch oven is a versatile piece of cookware that can last for generations if you take proper care of it. One of the most important aspects of maintaining your Dutch oven is keeping it clean. In this section, we will discuss three effective cleaning techniques for Dutch ovens: wiping with damp cloth, soaking in hot water and dish soap, and using baking soda for stains. H3: Wipe with Damp Cloth One of the simplest and most effective ways to clean your Dutch oven is by wiping it down with a damp cloth. This method works well for light buildup or residue. You can do this after every use, or between meals, to keep your Dutch oven in good condition. To wipe your Dutch oven, simply dampen a clean cloth with warm water and wipe the interior and exterior of the pot. Make sure to use a non-abrasive cloth and avoid using soap to prevent stripping the seasoning layer. H3: Soak in Hot Water and Dish Soap For more stubborn residue, soaking your Dutch oven in hot water and dish soap can help break down grime, grease, and food particles. This technique works well for removing tough stains and burnt-on food. To soak your Dutch oven, fill it with hot water and a few drops of dish soap and let it sit for an hour or two. Once the soaking time is over, drain the pot and use a non-abrasive sponge or brush to scrub any remaining residue. Rinse the pot thoroughly with warm water and let it air dry completely. H3: Use Baking Soda for Stains If you have hard-to-remove stains on your Dutch oven, baking soda can be a lifesaver. This technique is particularly effective for removing discoloration or staining caused by heat. To use baking soda, sprinkle it generously over the stain and add just enough water to create a paste. Use a non-abrasive sponge or brush to scrub the paste into the stain, then allow it to sit for an hour or two. Wipe out the residue and rinse your pot thoroughly with warm water. Dry the pot with a clean towel. Conclusion Cleaning your Dutch oven does not have to be a difficult task. With these simple techniques – wiping with a damp cloth, soaking in hot water and dish soap, and using baking soda for stains – you can keep your Dutch oven clean and in good condition. Remember to take good care of your Dutch oven by cleaning it after each use, storing it properly, and avoiding harsh chemicals or abrasive materials. By following these tips, you can enjoy your Dutch oven for years to come.Seasoning Dutch Oven
Seasoning an unseasoned Dutch oven protects it from rust and improves its non-stick qualities. A Dutch oven is typically made of cast iron and has a layer of seasoning that prevents rust and helps food from sticking to its surface. The seasoning is a layer of carbon that forms on the cast iron’s surface, which creates a smooth and non-stick surface over time.
Why Seasoning Is Required
Seasoning is required to maintain the cast iron material’s integrity and extend its lifespan. Seasoning the Dutch oven helps prevent the formation of rust, which can deteriorate the quality of the cast iron. A well-seasoned Dutch oven also has non-stick properties, which makes cooking and cleaning easier. The seasoning process gives the Dutch oven a layer of carbon that protects it from moisture and rust while providing a smooth cooking surface.
Method For Seasoning Dutch Oven
The following steps will help you to season your Dutch oven perfectly:
- Preheat your oven to 350°F (175°C).
- Clean the Dutch oven thoroughly with warm water and a soft-bristled brush to remove any dirt or oil residues.
- Dry the Dutch oven completely with a clean towel, ensuring there is no moisture present.
- Apply a thin layer of cooking oil to the Dutch oven’s surface using a cloth or a brush.
- Place the Dutch oven upside down in the preheated oven, ensuring it is in the middle rack of the oven.
- Bake the Dutch oven for an hour, then let it cool in the oven completely.
- Repeat this process 3-4 times until you get a smooth, dark layer of seasoning on the cast iron surface.
With this process, your Dutch oven is ready for use, and it will last for many years to come. To maintain the seasoning, avoid soaking the Dutch oven in water for too long, as this could cause rust to develop. Instead, clean it immediately after use with warm water and a soft-bristled brush. Dry promptly, and if needed, apply a thin layer of cooking oil before storing it.
Common Mistakes To Avoid
To maintain your Dutch oven, avoid rapid temperature change and use cooking fat to prevent food from sticking. Remember to wash by hand and handle with care to avoid chips or cracks in the enamel. Lightly oil before storing to prevent rust from forming.
Even the best Dutch ovens require proper maintenance to remain in excellent condition. You might be making some mistakes while trying to care for your Dutch oven. Here are some common mistakes and how to avoid them:Using It On High Heat Directly From Fridge
Rapid temperature change can damage your Dutch oven and affect its cooking performance. Placing a fridge-cold Dutch oven over direct high heat or putting a very hot pot into cold water can cause cracking and warping. To prevent this from happening, start by heating your Dutch oven over gentle heat, and gradually increase the heat as needed.Pouring Cold Water On Hot Dutch Oven
Pouring cold water on a hot Dutch oven can lead to thermal shock, which can cause cracks or warps in the pot. To prevent damage, allow your Dutch oven to cool for a few minutes before cleaning it with warm water.Other Mistakes To Avoid
Avoid using metal utensils when stirring or scraping your Dutch oven as they can scratch the enamel surface. Also, avoid using harsh detergents or abrasive sponges when washing your Dutch oven. Wash it by hand with warm soapy water, and avoid putting it in the dishwasher. Remember, proper care and maintenance of your Dutch oven goes a long way in extending its lifespan. Now that you know the common mistakes to avoid when caring for your Dutch oven, you can help keep it in great shape for years to come.Repairing A Damaged Dutch Oven
Maintaining a Dutch oven is crucial for its long-term use. If your Dutch oven is damaged, you can restore it by following the right steps. Take care to avoid rapid temperature changes and use non-abrasive cleaning methods like soaking in hot water and soap.
Additionally, lightly oiling the Dutch oven before storing can help prevent rust formation.
Dutch ovens are prized for their durability and longevity. But even with the best care, chips, cracks, burn stains, and food crusts can happen, especially with frequent use. In this section, we’ll cover how to repair different types of damage that can occur to your Dutch oven.Chips And Cracks In Enamel
If you notice chips or cracks in the enamel coating of your Dutch oven, stop using it immediately. These damages can worsen, leading to bacteria buildup, rusting, and ultimately, unusable cookware. The good news is that you can repair minor chips and cracks yourself with enamel repair kits available at hardware or kitchen stores. For larger damages, it’s best to seek professional enamel repair services or contact the manufacturer for warranty information.Burn Stains And Food Crust
Burn stains and food crusts can be stubborn to remove, but there are ways to bring your Dutch oven back to life. Start by filling the pot with hot water and adding a spoonful of baking soda, dish soap, or vinegar. Let it sit for a few hours or overnight to loosen up the stains. Then, using a non-abrasive sponge or brush, scrub away the grime. For extra cleaning power, create a paste with baking soda and water and apply it to the affected area. Let it sit for 10 to 15 minutes before rinsing it off with water. Another method to remove burn stains is to sprinkle salt evenly on the bottom of the pot and heat it on low heat for about 10 minutes. Then, using a paper towel or cloth, wipe the salt away along with the stains. To prevent future burn stains and food crusts, avoid cooking on high heat or leaving food in the pot for long periods. Also, use non-metal utensils to prevent scratching and damaging the enamel. In conclusion, repairing a damaged Dutch oven is possible with the right tools and techniques. Regular cleaning and maintenance can keep your Dutch oven in excellent condition for years to come.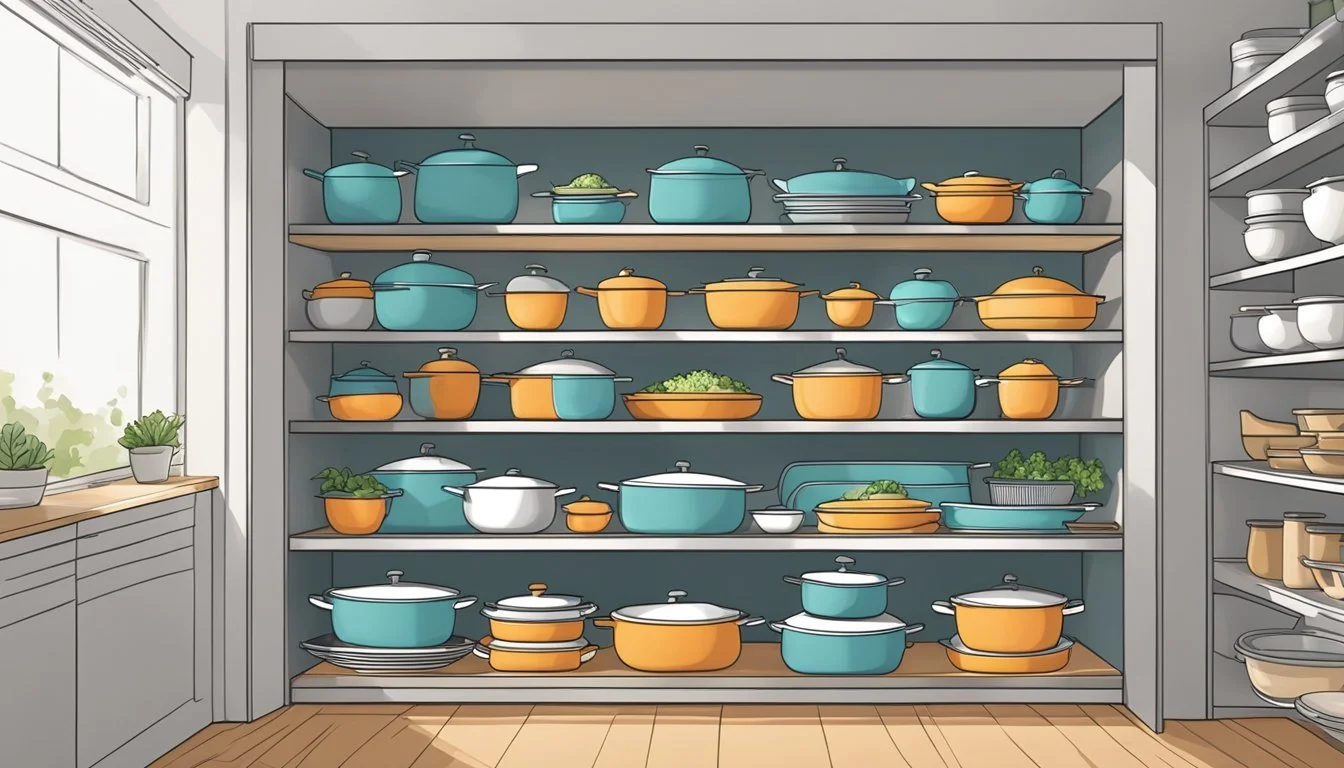
Credit: discover.texasrealfood.com
Storing Dutch Oven
To maintain your Dutch oven, it’s important to store it properly. Make sure to lightly oil the cast-iron surface before storing to prevent rust formation and handle it with care. Additionally, avoid rapid temperature changes and never use metal utensils on the enamel coating.
Hand washing your Dutch oven is also recommended.
Dutch ovens are not just a tool, they are an investment. Storing them properly is crucial in maintaining their quality and prolonging their lifespan. In this section, we will cover the best ways to store a Dutch oven, as well as some precautions to keep in mind.Best Ways To Store Dutch Oven
When storing your Dutch oven, it’s important to ensure it’s completely dry and free from any food residue. Here are some best ways to store your Dutch oven:- Store your Dutch oven on a flat surface where it won’t be disturbed to prevent it from falling over and getting damaged.
- Cover your Dutch oven with a lid or a cloth to protect it from dust, dirt, and other substances that can damage the enamel or create an unpleasant odor.
- If you have multiple Dutch ovens, you can store smaller ones inside larger ones to save space.
- If you have a cast iron Dutch oven, you can lightly oil it before storing to help prevent rust from forming.
Precautions While Storing
As mentioned, Dutch ovens are an investment, and you want to keep them in good condition for as long as possible. So, here are some precautions to keep in mind while storing them:- Avoid stacking heavy objects on top of your Dutch oven, as this can cause the enamel to chip or crack.
- Store your Dutch oven in a dry and well-ventilated place to prevent moisture and humidity, which can cause rust to form or damage the enamel.
- Never store your Dutch oven with the lid sealed tight, as this can cause a musty odor to develop and make cleaning your Dutch oven more difficult.
Frequently Asked Questions Of How To Maintain Dutch Oven
How Do I Take Care Of My Dutch Oven?
To take care of your Dutch oven, always use cooking fat, avoid high heat levels, don’t use metal utensils, wash by hand and handle with care. Lightly oil it before storing to prevent rust formation. Don’t use it if there are chips or cracks in the enamel as this can worsen the damage.
Soak it in hot water and dish soap to clean it without scratching the enamel. Always wash it by hand with a sponge and never use steel wool.
Should You Oil A Dutch Oven?
Yes, you should oil a Dutch oven before storing it to prevent rust formation. Use a drop of vegetable or seasoning oil and spread it evenly all over the cast-iron surface using a cloth, paper towel, or your hands. However, do not use too much oil as it may become rancid over time.
Remember to wash it by hand and handle it with care.
What Do You Do When Enamel Wears Off Dutch Oven?
If the enamel on your Dutch oven wears off, stop using it immediately as the damage can worsen. Do not use metal utensils, be conscious of heat levels, and always wash it by hand. Before storing, lightly oil the surface inside the pot with a drop of vegetable or seasoning oil to prevent rust formation.
What Damages Dutch Oven?
Rapid temperature changes can damage a Dutch oven, leading to cracking or warping. It is crucial to begin with gentle heat and gradually increase when heating it over a stovetop. Also, avoid using metal utensils while cooking. Clean the pot using a sponge with a mild dishwashing liquid, and dry it thoroughly.
Pre-treat the oven with a little oil before storing it to prevent rust from forming on the cast-iron surface.
Conclusion
Maintaining your Dutch oven properly is essential for its longevity and performance. Remember to use cooking fat while cooking, be conscious of heat levels, and avoid using metal utensils. Additionally, always wash your Dutch oven by hand and handle it with care to prevent chips or cracks in the enamel.
By following these tips, you can keep your Dutch oven in good condition and enjoy its benefits for years to come.