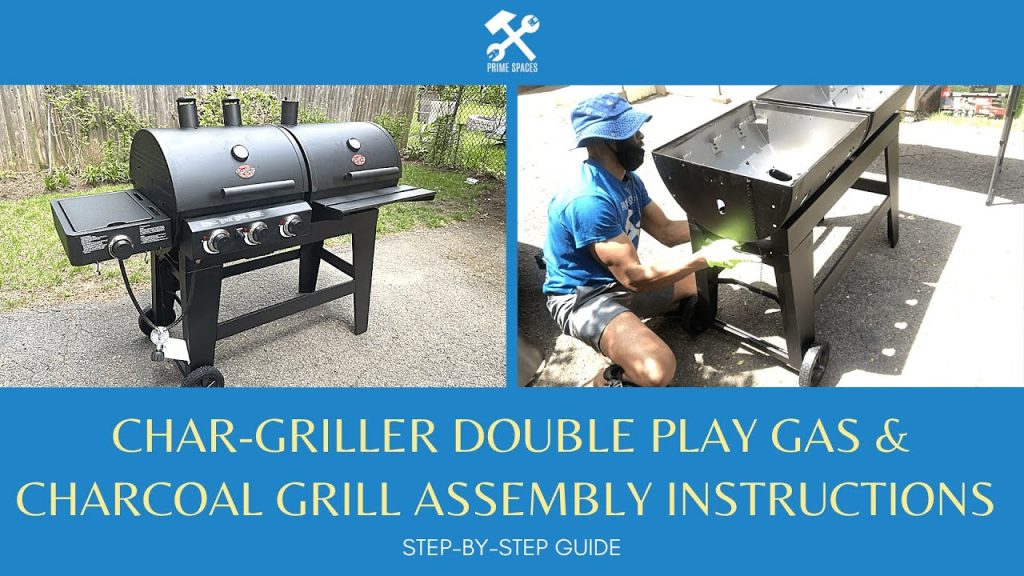
Char Broil grill assembly instructions can be found on the assembly manual provided with the grill. Step-by-step instructions for assembly include attaching the bottom shelf, back panel, tank exclusion, heat shield, side shelf, burner, heat tent, cooking grates, and grease tray.
Some videos are also available on YouTube that provide detailed instructions on assembling specific Char Broil grill models. Assembling a grill yourself is doable, but the difficulty level depends on the model. The grill model determines the number of parts, which can range from dozens to hundreds.
Make sure to carefully read and follow the assembly instructions to properly assemble the grill. Once assembled, the grill needs to be prepared before its first use, and instructions for this are also provided in the manual.

Credit: m.youtube.com
Assembly Process
Assembling a Char Broil grill can be made easy by following instructions. Videos are available with step-by-step guidance on how to assemble different parts of the grill. There are various ways to light a grill manually, and sources such as Consumer Reports offer detailed instructions on how to do so.
Side Carts And Bottom Shelf
The assembly process for your Char Broil Grill might seem daunting at first, but following the instructions carefully can make the process easier. Start by assembling the side carts and bottom shelf of your grill. Use the included screws to attach the carts to the grill’s legs. Next, attach the bottom shelf to the legs using the screws provided, and tighten them.Back Panel
The next step is to attach the back panel to the grill. Use the screws to attach the panel to the top of the grill’s legs. Ensure that the back panel sits firmly in place and doesn’t wobble.Weight Block And Tank Exclusion
After securing the back panel, attach the weight block to the bottom of the grill assembly. The weight block is responsible for keeping the grill stable, so ensuring it’s securely attached is crucial. Make sure to connect the tank exclusion collar and make it tight with screws.Front Door Brace And Heat Shield
The front door brace and heat shield are next in the assembly process. Use the screws provided to attach the brace to the front of the grill’s legs and then attach the heat shield to the brace. The heat shield protects the grill and the user from high temperatures.Right Side Shelf
Attach the right side shelf to the right panel of your grill. Use the screws and clips to attach it and make sure it doesn’t wobble or move.Side Burner
The side burner of your grill comes fully assembled and can be installed by attaching it to the right side of your grill. Use the screws to secure the side burner to the right panel of the grill.Heat Tent
Attach the heat tent to the base of the grill on the left side. Ensure the heat tent is secure by tightening it with screws. The heat tent is responsible for distributing heat evenly throughout the grill.Cooking Grates
Once the heat tent is securely attached, install the cooking grates. Place the grates on top of the burners, ensuring they’re in place correctly. Make sure the plates sit flat, and they’re not tilted or wobbly.Grease Tray And Pan
Finally, attach the grease tray and pan, which are responsible for collecting any grease or drippings. The tray and pan fit on the bottom of the grill, underneath the cooking grates. Make sure they’re fully seated before securing them with screws. Ensure everything is tightly secured now that your grill assembly is complete. By following these assembly instructions, your Char Broil Grill should be ready to use and enjoy in no time!
Credit: www.amazon.com
Alternate Assembly Guide
Assembling a Char Broil grill can be a challenge, but with the help of these alternate assembly guides, you can follow step-by-step instructions from fellow grillers. Whether you prefer watching YouTube videos or reading written instructions, these resources will provide you with clear guidance on assembling your new grill.
Alternate Assembly Guide for Char Broil Grill Are you struggling with the assembly instructions for your Char Broil grill? Don’t worry; we’ve got you covered. We have an alternate assembly guide that simplifies the process into six easy-to-follow steps. Step 1: Cutting Open the Box Begin by cutting open the bottom of the box to remove the contents. Make sure you don’t damage any important parts while doing this. Step 2: Hooking Up the Two Sides Next, hook up the two sides of the grill together. This can be accomplished by sliding the tabs on one side of the grill into the slots on the other side. Step 3: Sliding the Drip Pan in from the Back of the Grill Slide the drip pan in from the back of the grill until it is securely in place. This will help catch any excess grease while cooking. Step 4: Putting the Bolt Through the Hole from Inside Out Take the bolt and put it through the hole from the inside out. This will help secure the grill in place. Make sure to use a wrench to tighten the bolt. Step 5: Putting the Cap Back on the Igniter Put the cap back on the igniter and make sure it is securely in place. This will help you start the grill when it’s time to cook. Step 6: Assembling a Four Burner Char Broil Performance Grill If you have a four burner Char Broil Performance Grill, you will need to follow these additional steps: – Attach the bottom shelf and legs – Connect the cart/cabinet to the bottom shelf – Attach the wheels – Place the lid on top of the grill and secure it in place – Hook up the control knob – Install the side burner shelf and side shelves – Install the ignition button/battery – Attach the side burner – Place the heat tents, grates, and warming rack – Put the grease tray and pan in place – Connect the propane tank Using this alternate assembly guide will allow you to assemble your Char Broil grill with ease. Happy grilling!Preparing The Grill For The First Use
Before using your Char Broil Grill for the first time, make sure to follow the assembly instructions carefully. These may vary depending on the specific model you have, but typically involve attaching the wheels, bottom shelf, and propane tank. Once assembled, it’s important to properly prepare the grill for use by cleaning it, seasoning the grates, and properly igniting the burners.
How To Use A Char-broil Grill For The First Time
Before firing up your Char-Broil grill for the first time, it is important to go through some preparatory steps. These steps will ensure that your grill is safe to operate and that your food will taste delicious. In this section, we will guide you through the necessary steps you need to take to use your Char-Broil grill for the first time.How To Prepare A New Gas Bbq For First Use
If you have just purchased a new Char-Broil gas BBQ, it is imperative that you prepare it for first use. This process is essential to ensure the safety and functionality of your new grill. In this section, we will outline the steps necessary to prepare your new gas BBQ for its first use.How To Hook Up A Gas Tank To A Charbroil Grill
Connecting a gas tank to your Charbroil grill is a simple process, but it is important to do it correctly. Connecting the gas tank incorrectly can lead to gas leaks and other safety hazards. In this section, we will guide you through the correct steps you need to take to hook up a gas tank to your Charbroil grill. To prepare your Char-Broil grill for the first use, follow these steps:- Clean the grates with a grill brush and warm soapy water, rinse and dry them properly.
- Create a solution of equal parts vinegar and water and clean the inside of the grill to remove any residue or chemicals left in the manufacturing process.
- Use a soft-bristled brush, so as not to scratch the paint or finish, to clean the outside of the grill.
- Season your grates with cooking oil to protect them from rust.
- Connect the propane tank to the grill, ensuring that all connections are tight, and turn on the gas.
- Turn on the grill to high heat and let it run for about 15 minutes. This will burn off any chemicals or residue left on the grill from the manufacturing process and also help to season the grates.
- After 15 minutes, allow the grill to cool down before turning off the gas and cleaning it again.
- Your Char-Broil grill is now ready for its first use!
- Ensure the gas valve on the propane tank is off.
- Attach the regulator hose to the propane tank by hand, ensuring that it is fitted well and tightened. You might need to use a wrench to tighten it further, but remember not to over-tighten it.
- Locate the position of the regulator on the grill, usually on the left or right side of the grill body.
- Connect the regulator to the hose that is coming from the propane tank by pushing it into the nozzle and twisting it until you hear a click.
- Check all connections by spraying soapy water over them. If bubbles form, it indicates a gas leak and the connections need to be checked and tightened again.
- Open the propane tank valve slowly. Gradually raising the regulator knob makes lighting the grill easier.
- Next, turn on the burners to a low setting and ignite them using the igniter button. The grill should be ready for use now.
Grill Assembly Instructions Resources
Assembling a Char Broil Grill can look like a daunting task. However, with the right guidance, the process is straightforward and can be accomplished in just a few hours. This blog post will provide you with a list of resources to help you assemble your Char Broil Grill with ease.
Assembly Instructions In The Assembly Manual
One of the critical resources that will assist you in assembling your grill is the assembly manual that comes with the grill. The manual contains step-by-step instructions on how to assemble your grill, including a list of all the tools you will need. The manual comes with detailed diagrams that will help you to assemble your grill quickly.
Char-broil Grill Replacement Assembly Instructions
If you need to replace any of the components on your grill, you can find assembly instructions on the Char Broil website. The instructions come with a detailed list of tools needed to complete the installation.
Char-broil Gas Grill Product Manuals
You can find product manuals available for download on the Char Broil website. These manuals provide you with information about all the features of the grill, as well as how to use and maintain your grill.
Char-broil Grill Assembly Manual
The Char Broil Grill Assembly Manual provides you with a comprehensive guide on how to set up your grill. The manual contains detailed instructions on how to prepare your grill for use, as well as maintenance instructions.
Overall, the resources listed above should provide you with all the necessary information you need to assemble and maintain your Char Broil Grill. Following these instructions and resources can help you set up your grill with ease and ensure that it is safe and ready to use.

Credit: www.amazon.com
Frequently Asked Questions For Char Broil Grill Assembly Instructions
How Do You Use A Char-broil Grill For The First Time?
To use a Char-Broil grill for the first time, follow the assembly instructions provided. The process varies depending on the model, but typically involves attaching the bottom shelf, firebox, control knobs, and other components. Once assembled, connect a gas tank and light the grill according to the manufacturer’s instructions.
It’s also recommended to season the grill grates before use by wiping them with oil and heating them for 15 minutes.
How Do You Hook Up A Gas Tank To A Charbroil Grill?
To hook up a gas tank to a Charbroil grill, follow the instructions provided in the assembly manual provided by Charbroil or follow YouTube videos that demonstrate assembly instructions. Make sure you have all necessary tools and understand how to connect the propane gas tank to the grill safely.
Charbroil provides user manuals and instruction videos for assistance.
How Hard Is It To Assemble A Grill?
Assembling a grill yourself is doable but difficulty level depends on the model. Some arrive in dozens, others in hundreds of parts. However, with proper tools and following instructions provided in the assembly manual, it should be relatively simple. Videos outlining the assembly process are also available on YouTube for specific Char-Broil models.
How Do You Light The Side Burner On A Char-broil Grill?
To light the side burner on a Char-Broil grill, turn the propane tank on, then turn the burner knob to the ignite position and continue to turn until the burner lights. Be sure to consult the assembly manual for specific instructions.
Conclusion
Assembling a Char Broil grill may seem like a daunting task at first, but with the right instructions, it can be done easily. By following the assembly instructions provided by the manufacturer or watching helpful online tutorials, you can enjoy delicious barbeque in no time.
Remember to take your time during assembly, read each step carefully, and gather all necessary tools before starting. With patience and persistence, you’ll be a Char Broil grill assembly pro in no time!